Transit gateway route table and check for the result
For Transit Gateway Attachment to work, we need to create a route table for them. In this section, you will create a route table and check if the systems are connected to each other or not.
- Access Transit Gateway route table
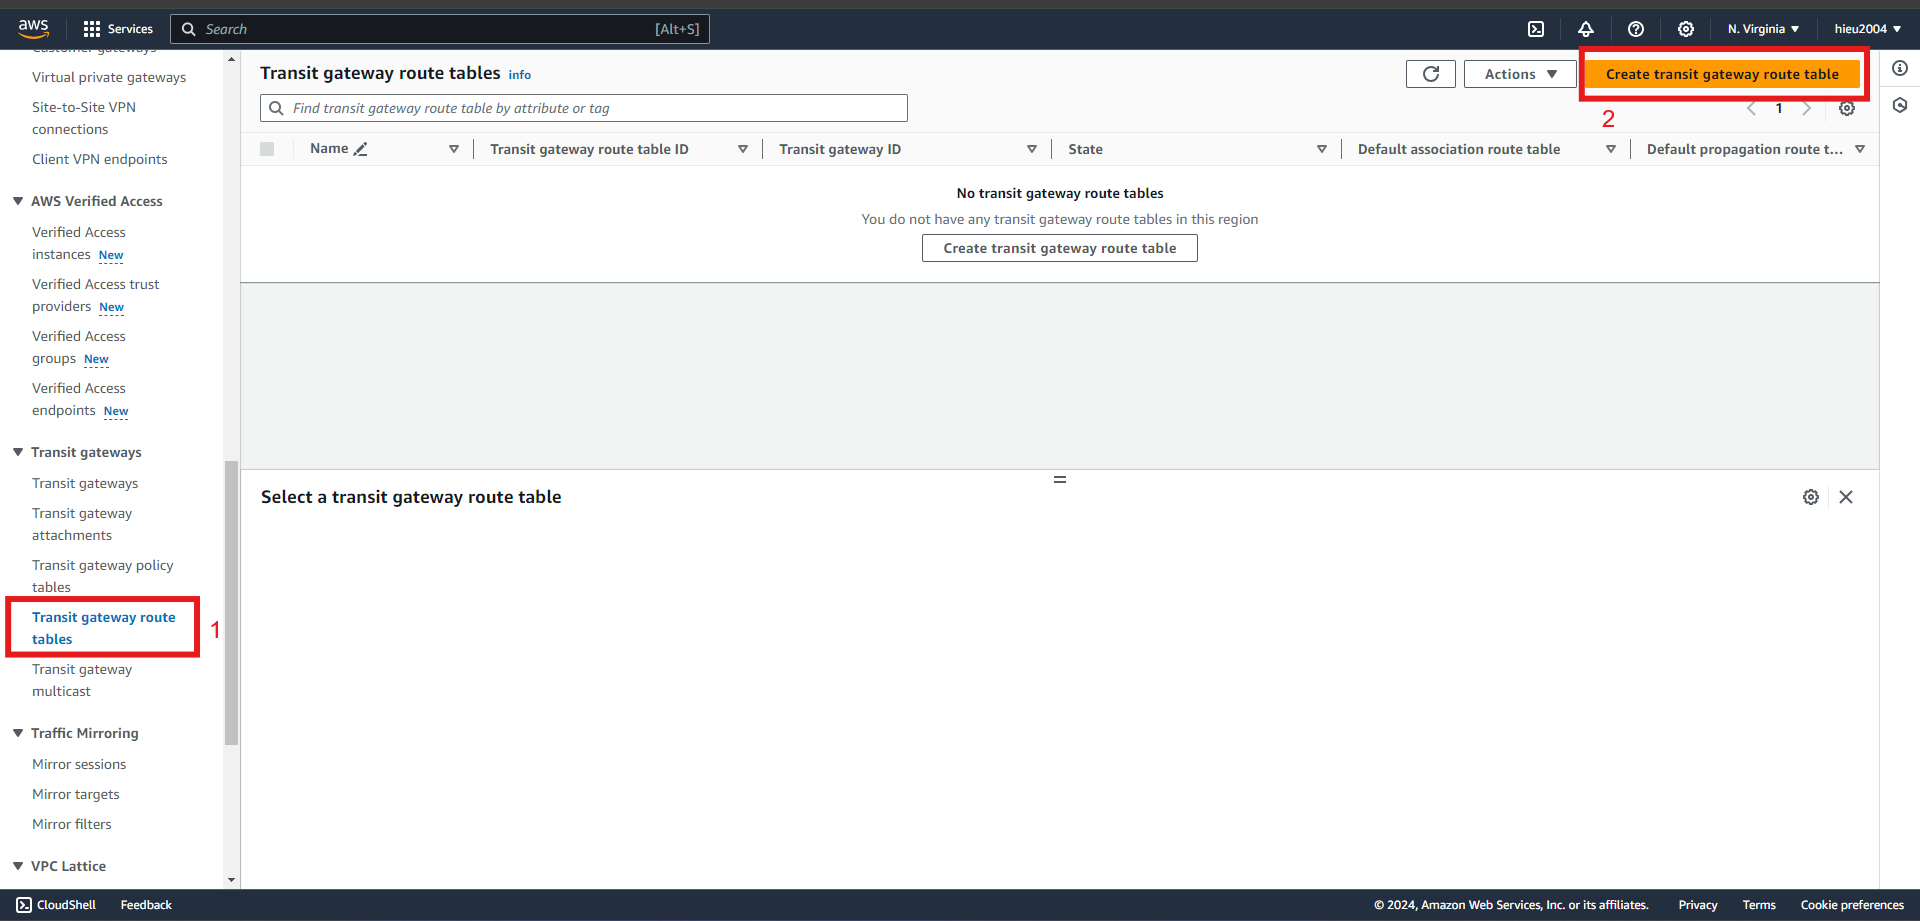
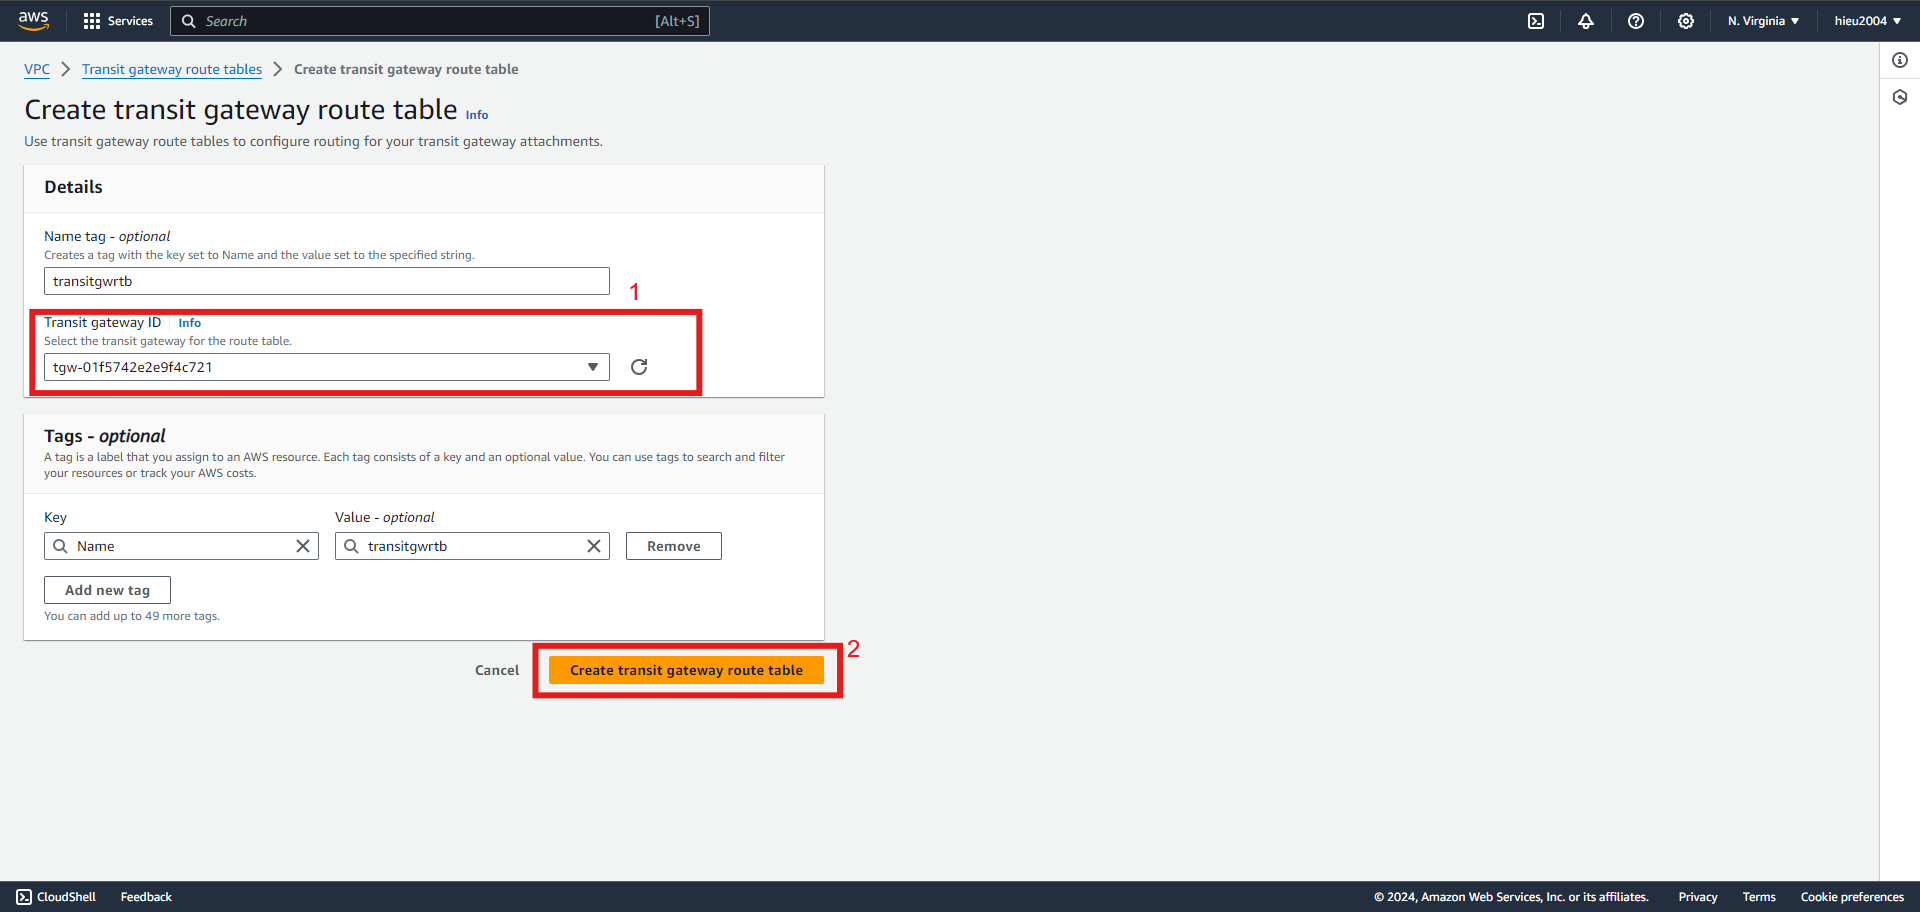
- Select Transit Gateway and Create Transit Gateway route table.
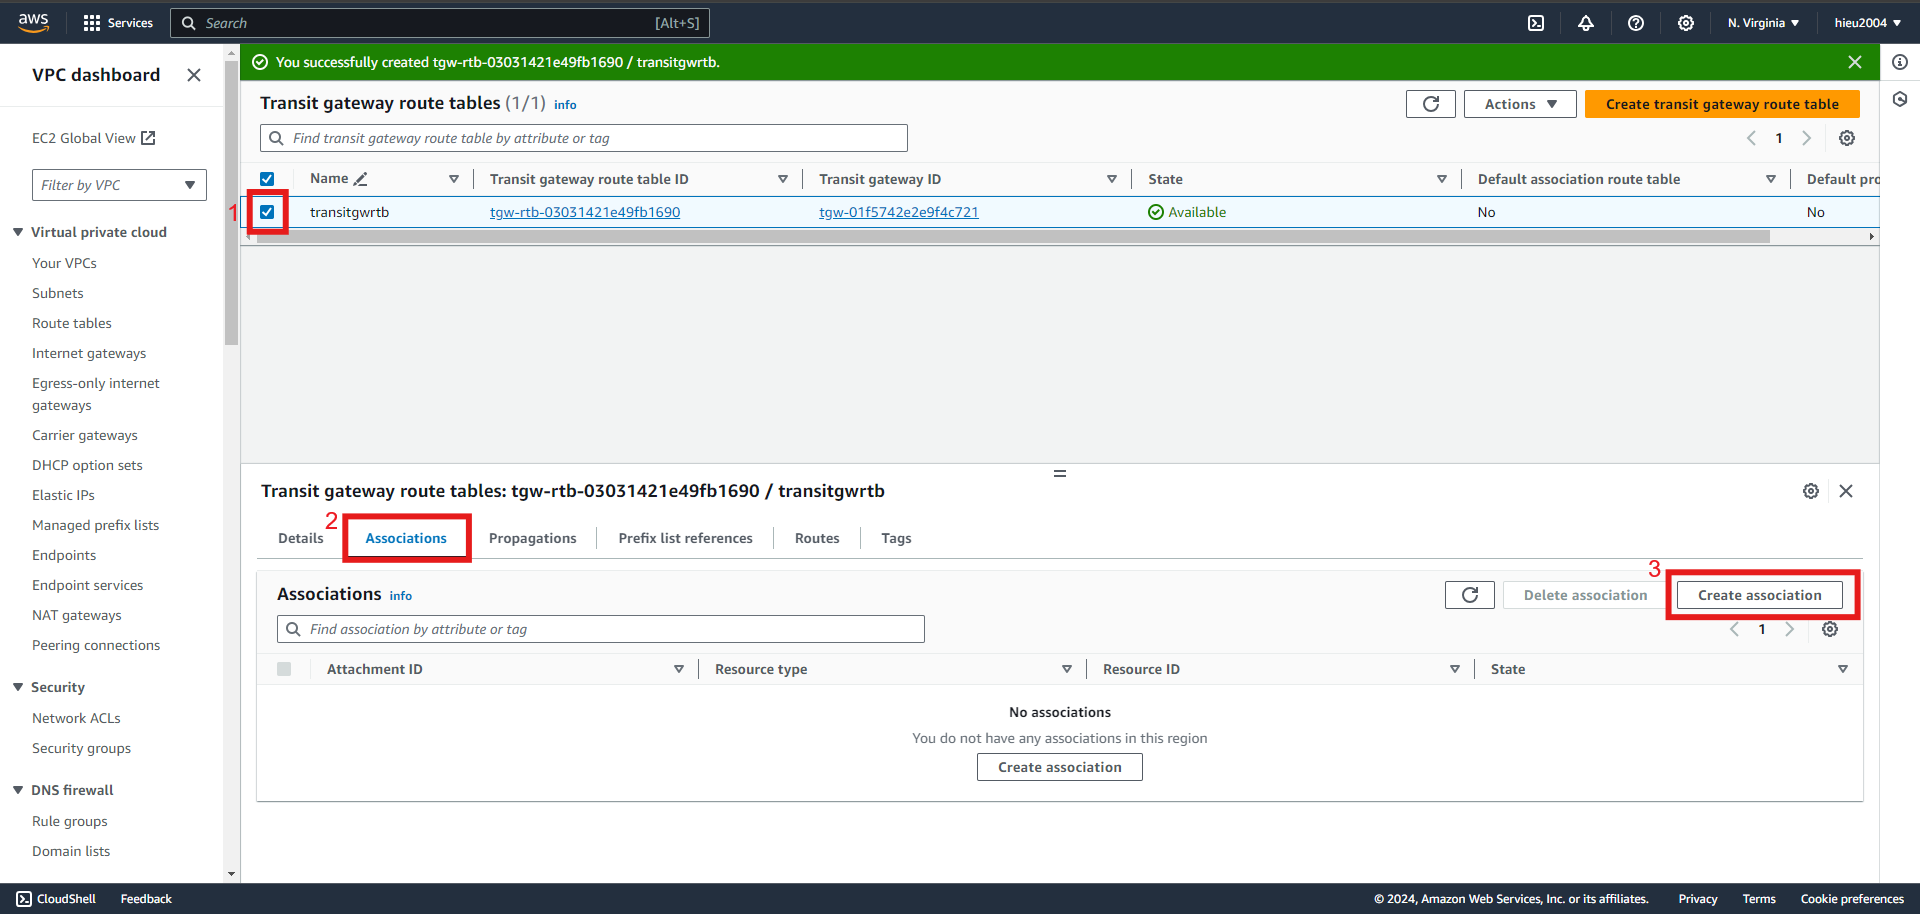
- Select route table which just created -> Associatons -> Create Associations
- Select Attachment -> Create Associations
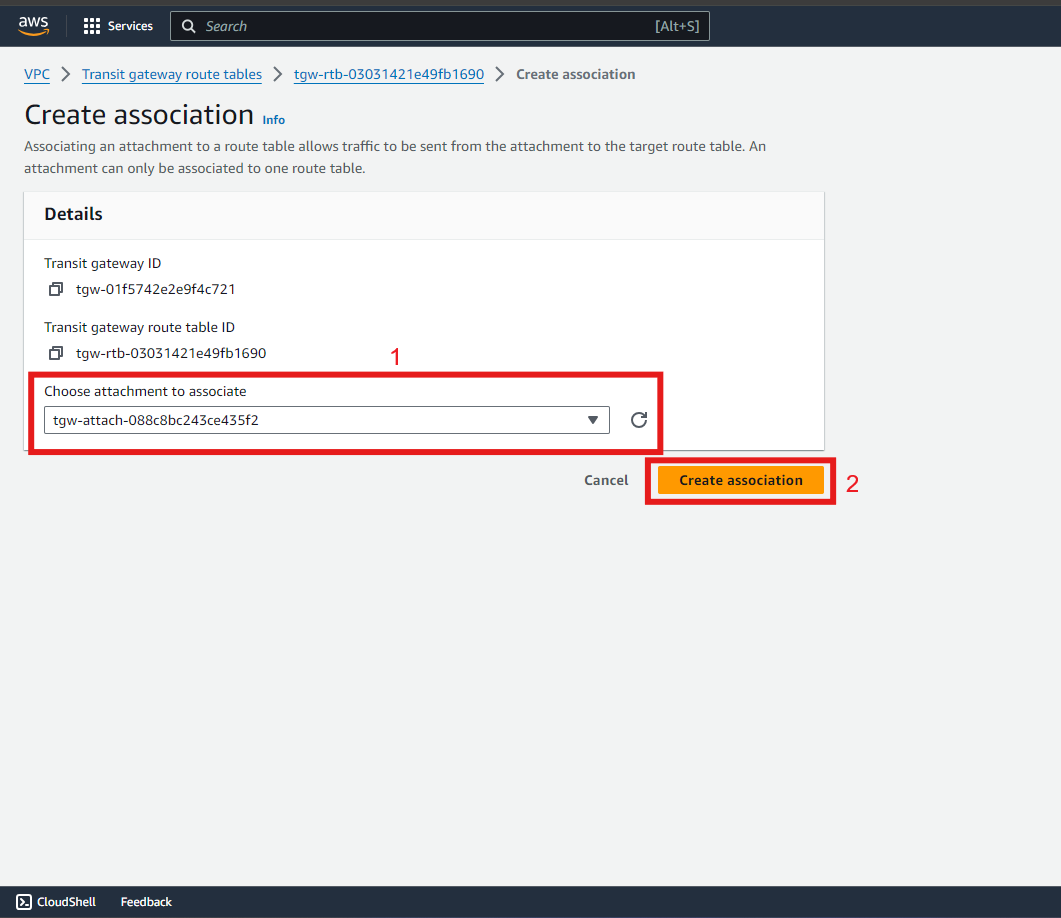
- Do the same with other attachments
- Continue with that route table -> Propagations -> Create Propagations
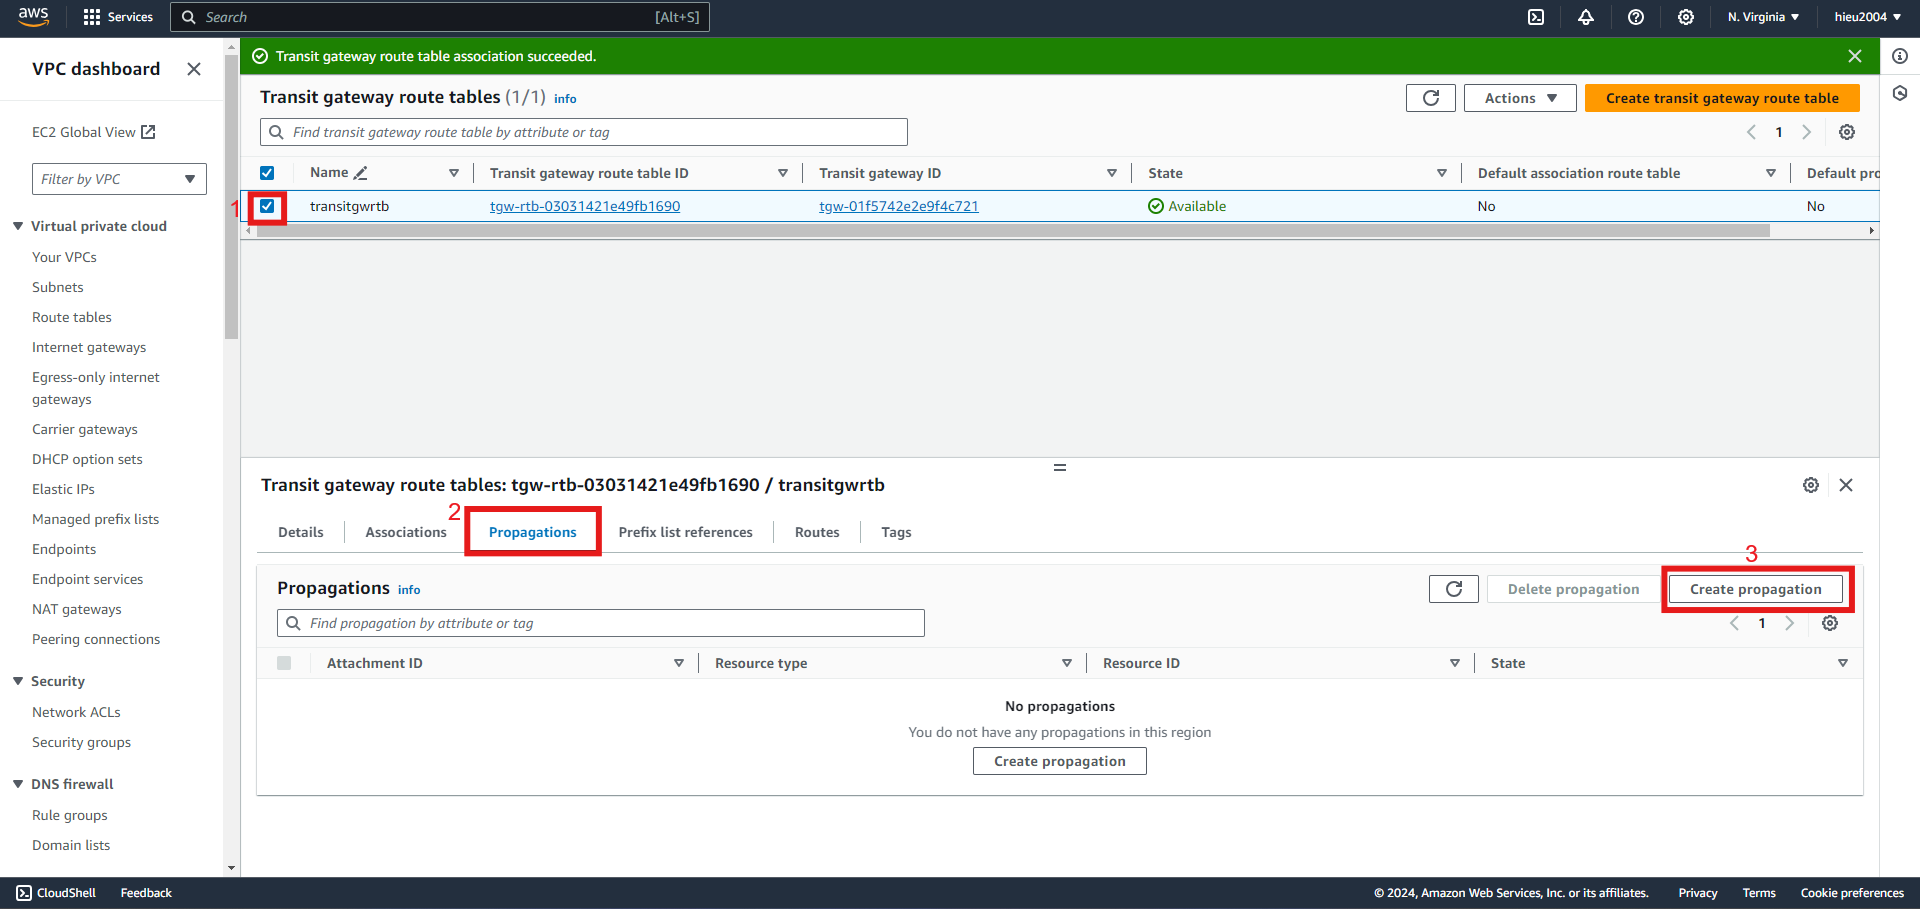
- Select Attachment -> Create Propagations
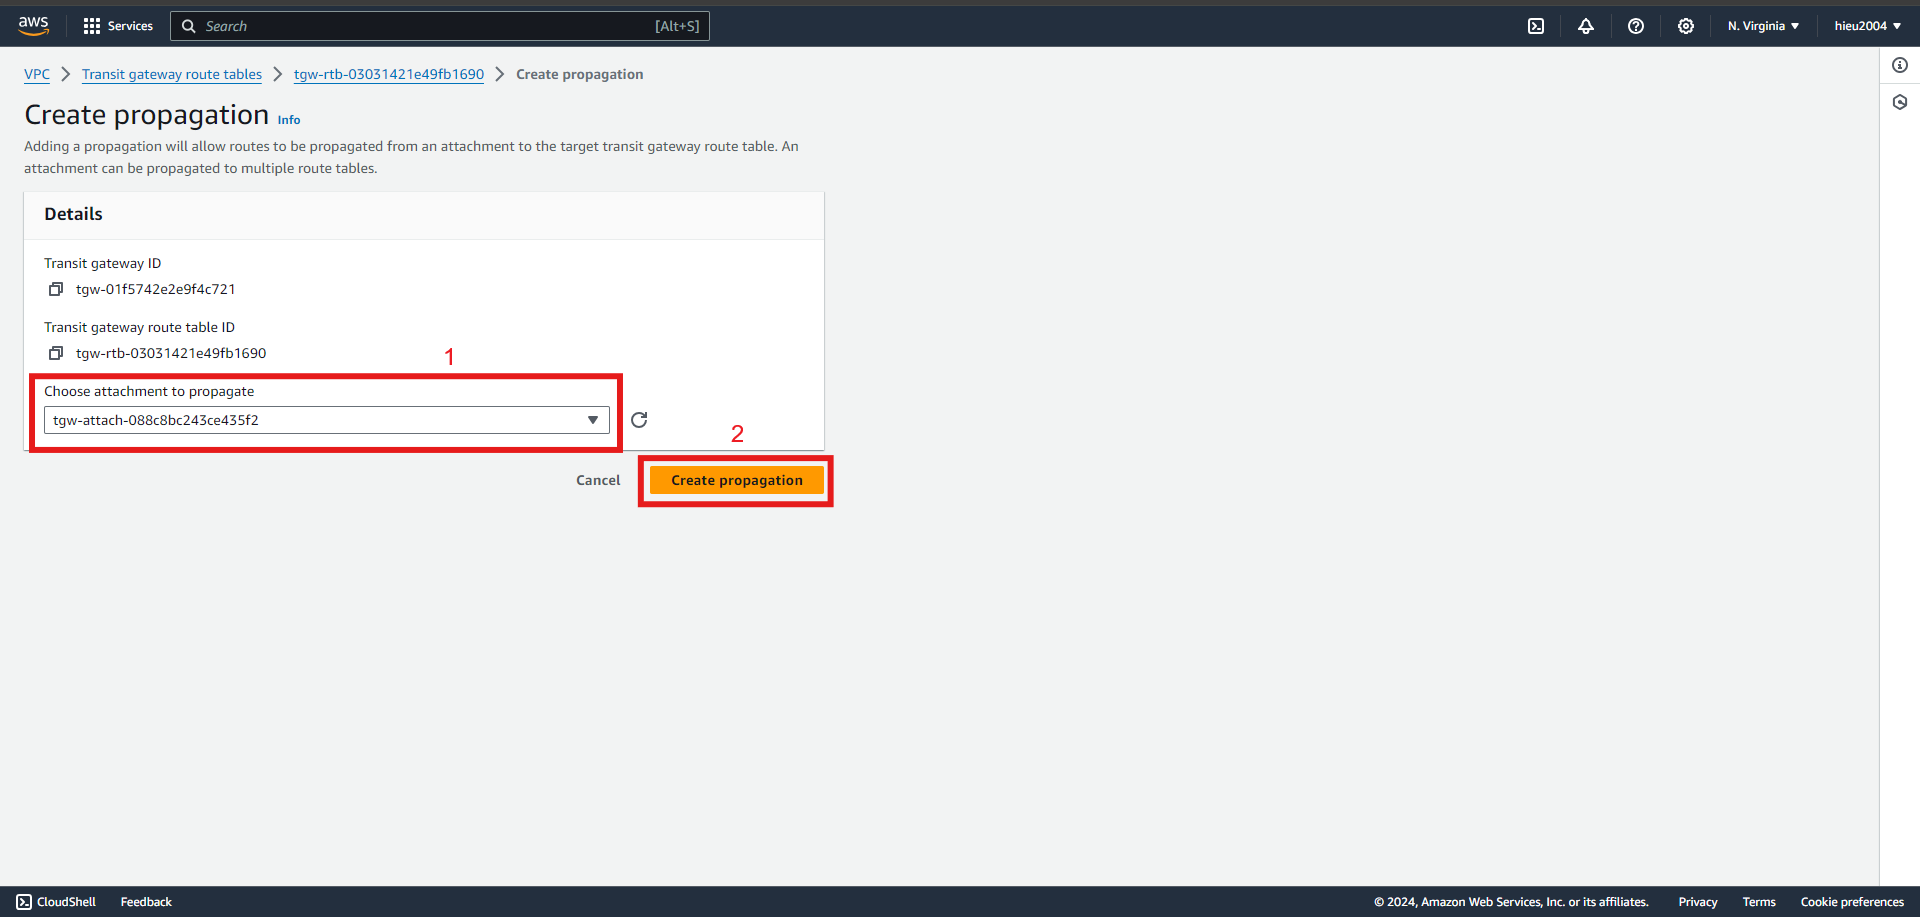
- Do the same with other attachments
Next, we going to config route table to add route from transit gateway
- Access route table -> select route table -> routes -> edit routes
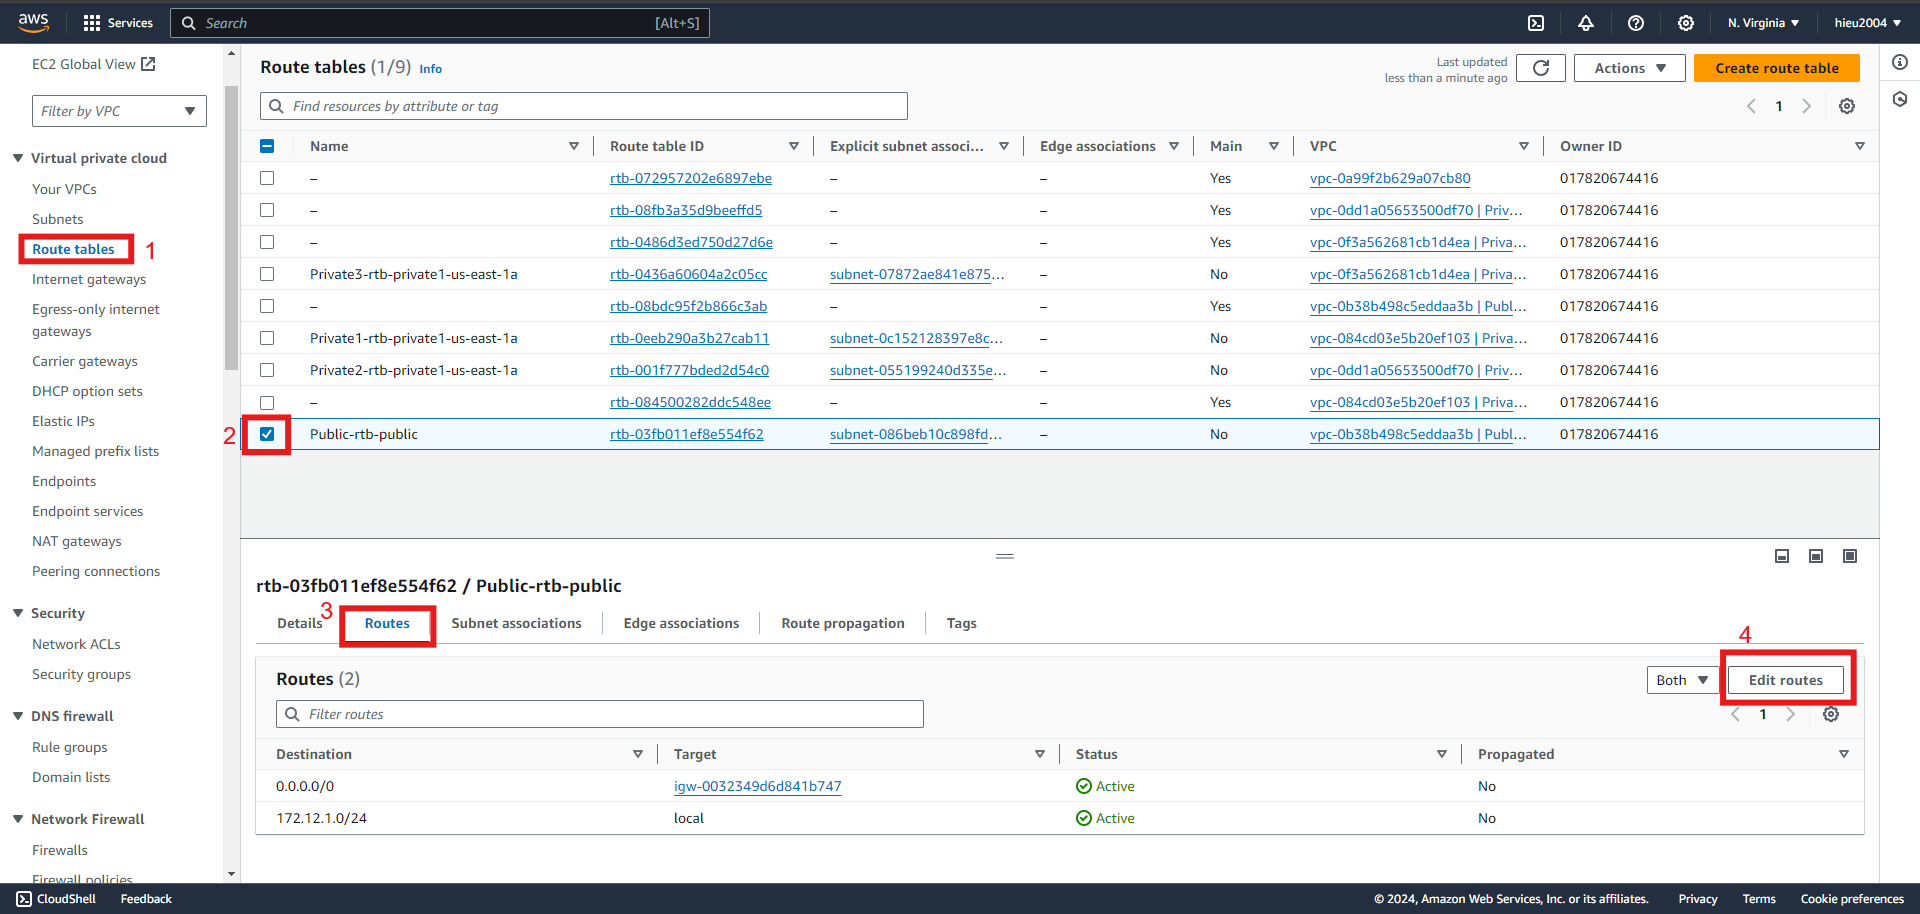
- With Public route table, we add route and config it
- Fill IP address 172.12.0.0
- Select Transit Gateway.
- Select Transit Gateway which is created.
- Save changes
- With Private route table, we add route and config it.
- Fill IP address 0.0.0.0/0
- Select Transit Gateway.
- Select Transit Gateway which is created.
- Save changes
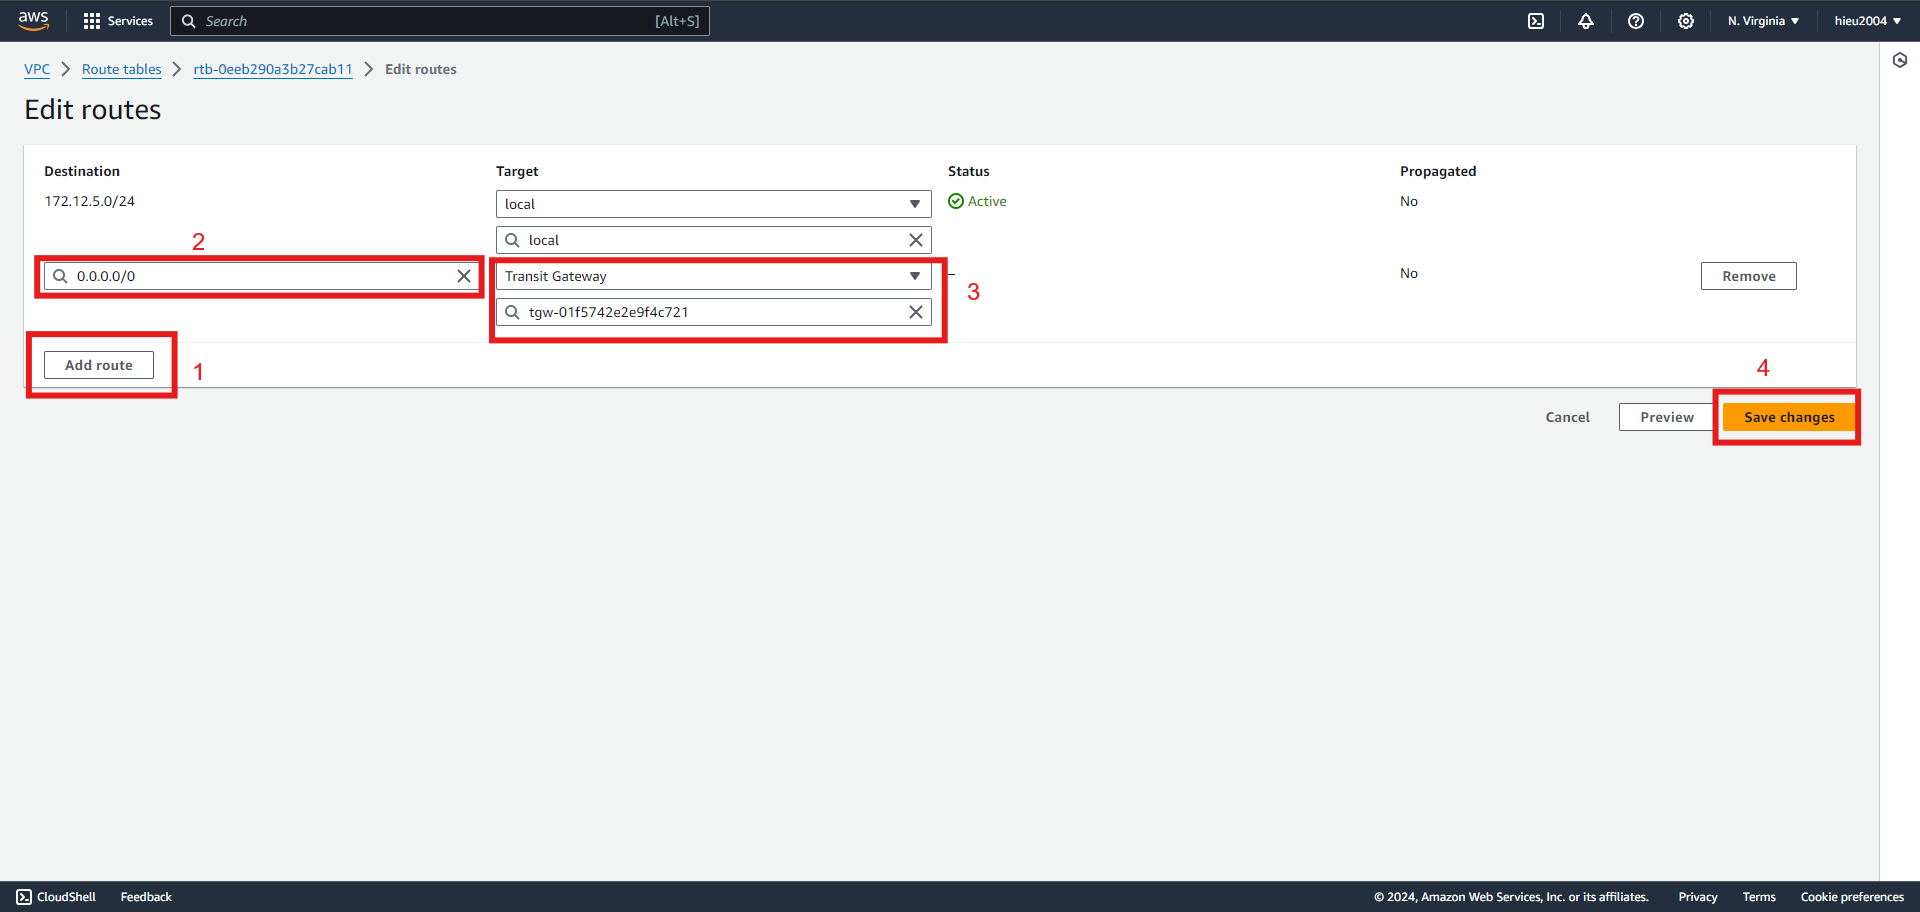
- Do the same with other private route table
Test the connection between VPCs
- We will SSH from EC2 public to EC2 private to test the connection between private EC2
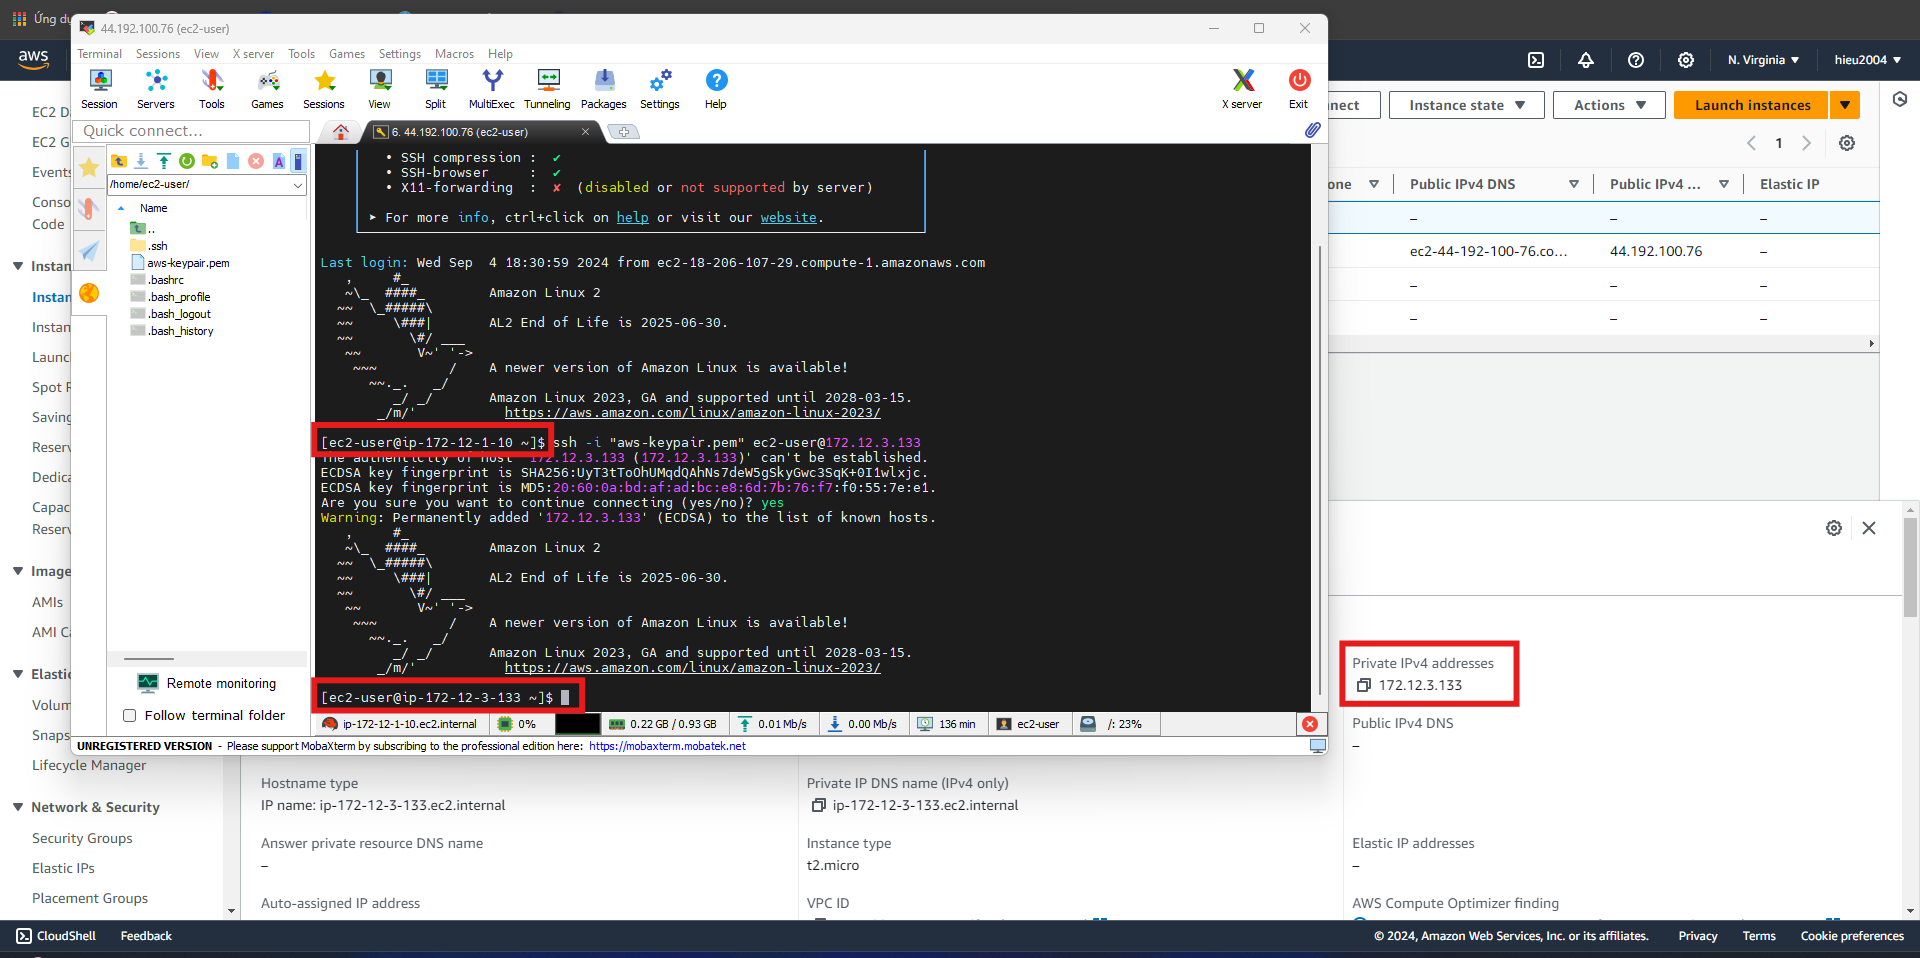
ssh -i "file-name" ec2-user@<private ec2 ip>
- After accessed into EC2 private 1 we ping to EC2 private 2 and 3
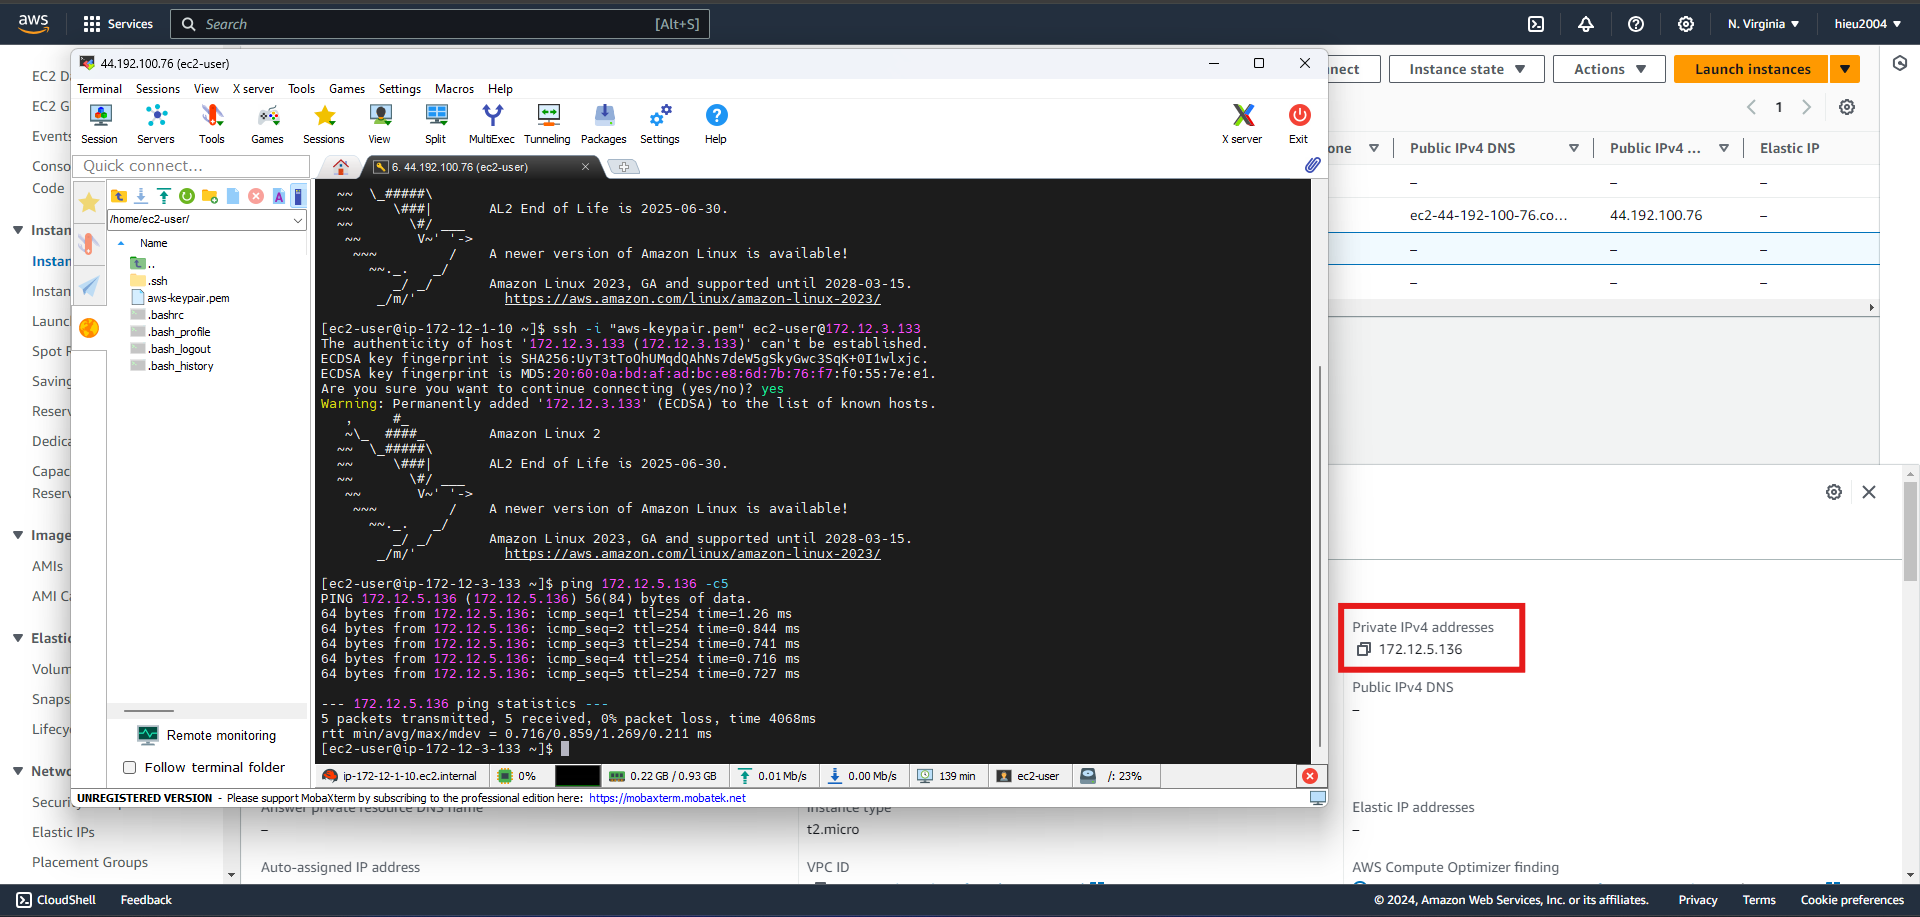
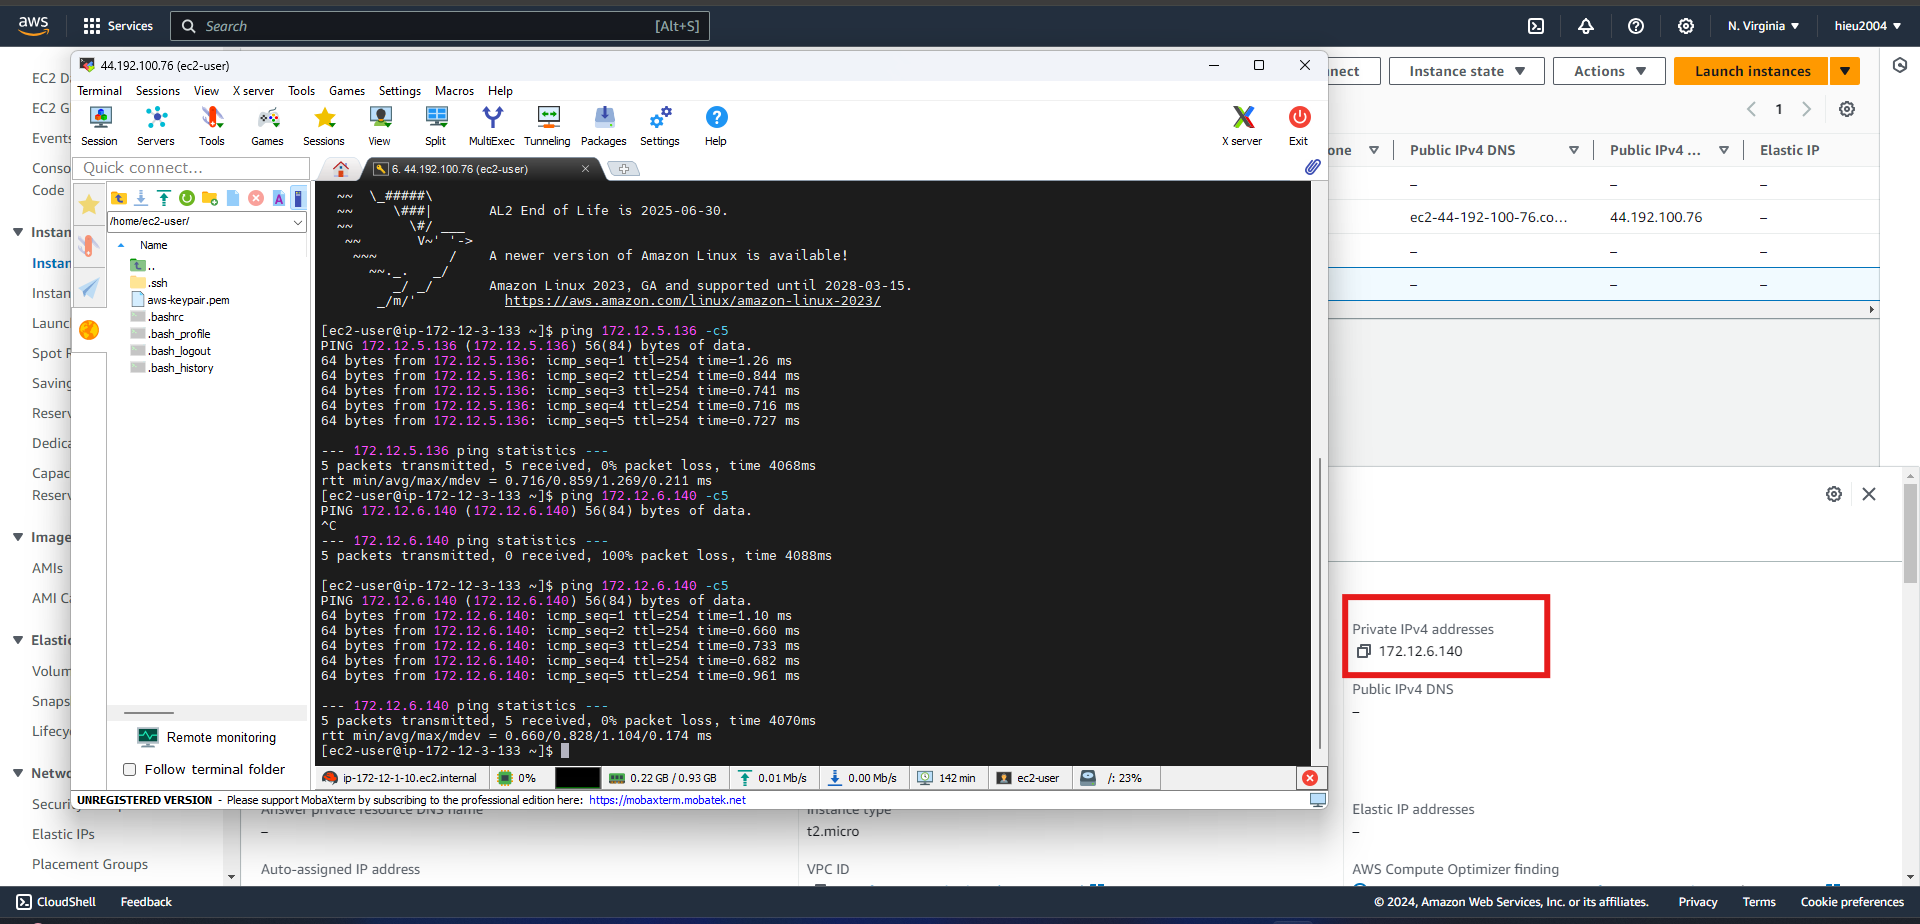
Congratulations. The EC2 Instances in your VPCs were able to connect through the Transit Gateway. For monitor transit gateways, you can reference this article CloudWatch metrics